Today
I thought I would put together a little lip scrub post. I don't know about you
but my lips have felt the effects of air conditioning and also all the bad
weather here in Scotland as it really can’t make up its mind whether it wants
to be sunny or rainy!
Thursday, 1 October 2015
Monday, 27 July 2015
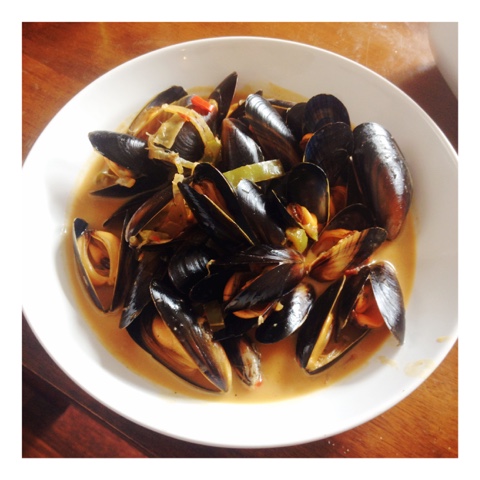
Mussels in a Lightly Spiced Vietnamese Broth
 |
 |
 |
 |
Hi guys,
I just came
back from the Lake District yesterday where I was visiting two of my best
friends who moved there a while ago, it was such a great, relaxing weekend but it’s
time to get back to reality. I recently posted my Mussels dish to Instagram and
you went crazy for it so I decided to put together a recipe for you. I did use
more of the Posh
Pickles SaVa Tu`o`ng o`t V Relish* as I loved using it in my Vegetarian
Vietnamese Soup but I wanted to try something different. I was going
through my local Morrison’s and stopped at the fish section to pick up some
seabass and saw a huge bag of fresh mussels still in their shells and that’s
when I knew what I wanted to do with this relish.
Mussels are a
thing of beauty, I adore seafood and eat it as much as I possibly can as its
super healthy and it tastes amazing. You will notice in my recipe that I have
used some of the ingredients that are already in the relish but I always double
up on flavour when I use a premade product as I want to make the dish to sing and
as this was a main meal I really wanted it to pack a punch. This recipe serves
two people for a main with some fries or bread or both.
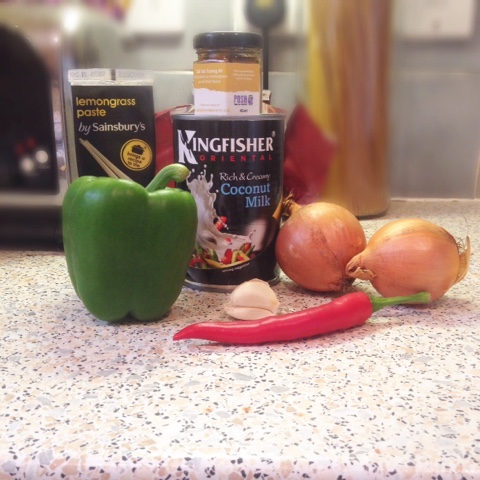
Ingredients
2 x Small
Brown Onions (or 1 large one), finely sliced
2 x Garlic
Cloves, finely sliced
2 Inch Piece
of Fresh Ginger, julienne style
1 x Green
Pepper, finely sliced
1 x Red
Chilli, sliced
1 x Can of
Coconut Milk
Glug of water
to stop it becoming too thick
Soy Sauce
1 Tbsps. Fish
Sauce
1 kg of fresh
mussels (ask fishmonger to clean and prepare them for you)
Zest and juice
of a lime
Method:
Use a large,
deep pot with a lid as you will be steaming the mussels in the sauce once it’s
ready.
To a large pot
add some olive oil and finely sliced onions. Allow to cook out on a medium/high
heat until nicely coloured.
Add the relish
to onions and leave to cook out for a few minutes to awaken the flavours.
Add in garlic,
ginger, peppers, red chilli and coconut milk. Give it all a good stir to make
sure it’s mixed.
Leave for a
few minutes before adding fish sauce, lime zest & soy sauce. I added the
water at this stage too as it was looking a little thick, I also added in a
small amount of garlic puree as I am a garlic fiend but you can skip this step
if you are not as keen on it.
Leave the
sauce to cook out for 10 minutes to let all the flavours infuse, give a stir
and then add in your mussels and lime juice.
Put a lid on
top or something to cover the pot as you want the mussels to steam. I left mine
for 4 minutes as the shells were open. Discard any that are still closed.
Fill a
bowl with your delicious mussels, throw over some coriander (if you want to make it even prettier)
and serve with some crusty bread.
You will
notice that I didn’t add any additional salt or pepper as I felt mines was
alright on the seasoning front as I had the fish sauce, soy sauce and the
mussels which are pretty salty without adding more and overpowering the
delicate mussels. As the mussels begin to open they infuse the sauce with the
flavour of the sea so when you dig into your sauce it will taste a little
different but even better, trust me.
Both Liam and
I devoured ours as soon as it was served and he doesn’t even like seafood but
he asked to try something different and wanted something lightly spiced to I
came up with this. I would make this all the time if I could as it was full of
flavour, filled me up and was super easy to make. If you want to give it a go
and need to get your hands on the amazing Posh Pickles Relish then click here.
Thursday, 2 July 2015
Vietnamese Vegetable Soup with Posh Pickles
 |
 |
 |
 |
Hello guys,
I was in the
mood for a spicy broth with a load of vegetables to have for a light meal and
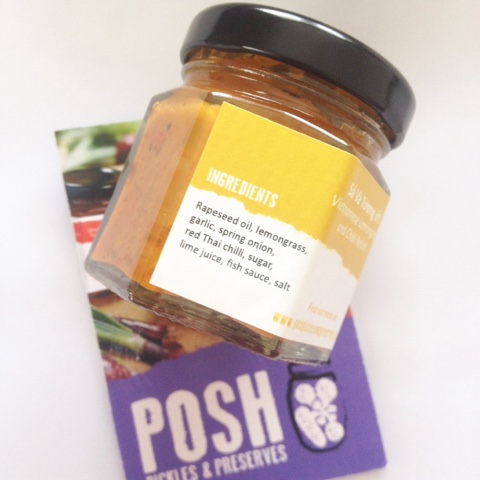
decided to use my Posh
Pickles Sa Va Tu’o’ng ot relish* (from £3.50) as it sounded perfect
and exactly what I was looking for. This turned out a lot better than I hoped
for as it was super tasty, easy to prepare and only took twenty minutes to cook
so I thought I would put together the recipe I used for you to try. I
completely forgot to take a picture of the finished meal as I was too busy
stuffing my face, so apologies guys.
As you know, I
like to put either vegan or vegetarian recipes on my blog as these recipes
completely fill me up but take away the stress of being calorific. But today, I
felt like a soup for these hot summer nights when a light meal is called for.
This can be served with some chicken, seafood or beef to bulk it up but I loved
it with just vegetables and noodles. This serves two people very easily as a
main meal with some leftovers or as a small starter for four people.
Ingredients:
2 tbsp. of Sa
Va Tu’o’ng ot relish
1 tbsps. of
coconut oil
1 x brown
onion, half mooned
1 x red
pepper, thinly sliced
2 inch piece
of fresh ginger, thinly sliced
1 x clove of
garlic, crushed
6 x large
shiitake mushroom, thinly sliced
Handful of
Water Chestnuts, halfed
2 x handfuls
of bean sprouts
1 x carrot,
finely sliced
1 x vegetable
stock cube (chicken stock can be used if working with meat)
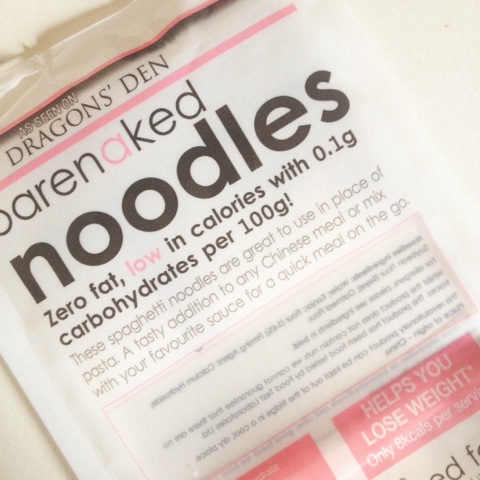
1 x pack of
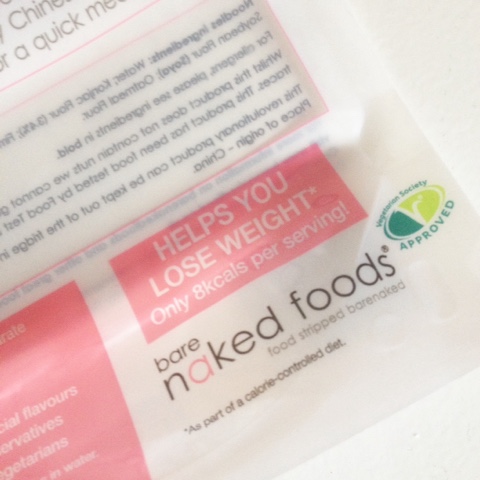
noodles (I used bare
naked noodles as they are low in fat/calories and gluten/wheat/dairy
free)
Soy Sauce, add
to taste
Handful of
fresh coriander, chopped
Handful of
Organic Spinach, chopped
To serve:
Spring onions,
finely sliced
Red chilli,
finely sliced
Fresh Lime
juice
Method:
Fry off onions
in the coconut oil on a medium heat for 10 minutes or until soft and slightly
browned.
Add in the Sa
Va Tu’o’ng ot, mushrooms, garlic and ginger and fry off for a few minutes.
Add the stock
according to the pack instructions and then add water chestnuts, carrot,
peppers and soy sauce.
Leave to
simmer away for 10 minutes until vegetables become softer and then add the
noodles and bean sprouts. The noodles I used only took 3 minutes to cook
so I added these in last with my bean sprouts as well as my spinach and
coriander but if your noodles take longer then add them in at the stock stage
so they cook properly.
Add everything
else and leave for five minutes to wilt. Taste the soup to see if it needs any
more soy sauce and grind in some black pepper too. When serving, squeeze over
some fresh lime juice, pop some spring onion and chillies on top for decoration
and enjoy!
You want the vegetables to almost look julienne style, but dont worry if they aren't, I just sliced mine super thinly so it would be easier to eat. You can add more relish, more chillies, pretty much more of anything if you prefer it to taste stronger but I loved this
soup the way it was. It is fragrant and light but as I said earlier, you can add in meat or
seafood to bulk it up, I think adding mussels and prawns in the place of some of
the vegetables would work well with a little lemon or lime juice squeezed over
before serving. This is a lightly spiced broth with nothing but healthy
goodness.
Posh Pickles
are a great company which was thought up by the beautiful Stephanie Bath in
2005. She actually started this up whilst she was on kidney dialysis. She has
won The Prince’s Trust Award for Business Success in 2006 and Outstanding
Business Achievement Award in 2007. They offer exciting flavour combinations in
chutneys, relishes, oils and jams. They also offer small jars as wedding
favours so if you or anyone you know is looking for something
different then check out their website. If you want to check out the other
flavours from Posh Pickles then head to their Website, Twitter or Facebook.
Let me know if
you try this recipe, it is absolutely gorgeous and the Sa Va Tu’o’ng ot relish
gives the soup a beautiful base to work with. I made this for myself and my mum
which were quite substantial bowls and we still had loads left over. If you
have some left, just leave the soup to cool down and pop into tubs and store in
the fridge. It should stay fresh for up to 2 days.
Sunday, 19 April 2015
Chickpea, Potato & Spinach Rogan Josh
 |
Hi guys,
I posted a
picture to my Instagram feed
a few weeks ago which showed a Chickpea, Potato and Spinach Rogan Josh; it
seemed to go down well with my followers so I thought I would put the recipe
together for anyone who wants to try it out. This is one of mine and Liam’s
favourite curry's as it’s spicy, healthy, full of flavour and absolutely
delicious. We normally make this which serves about 4 - 6 depending on portion
sizes and then freeze whatever is left in freezer bags, make sure the mixture
is cool before doing so though.
This curry can
easily be made vegetarian by replacing the chicken stock cubes with a vegetable
stock cube instead. If you wanted to make it vegan then look for curry
pastes and stock cubes that are suitable for vegans.
Ingredients:
2 Tbsps. of
olive oil
1 x Red Onion
2 x Brown
Onions
3 x Garlic
Cloves (crushed)
1 x Tin of
Chickpeas (drained)
2 x Handfuls
of Organic Spinach
2 x Red
Chillies with seeds (remove seeds if you don't want it too spicy)
Bunch of Fresh
Coriander and stalks
2 Tbsps. of
Tomato Paste/Puree
1 x Tin of
Chopped Tomatoes
2 x Chicken
Knorr Stock Pot (replace with vegan/vegetable stock cube if needed)
8 x New
Potatoes (left whole) or 4 x Potatoes (quartered)
3 Tbsps. of
Patak’s Rogan Josh Paste
600ml of
boiled water
Natural
Yoghurt is optional if you want to use it to garnish and as a cooling agent
Extra chillies
and spring onion finely sliced as well as coriander for a garnish
Method:
Add the oil to
a pan and heat on a medium heat before adding all of the onions. Leave them to
cook out for about 10 minutes to brown them. The more colour on them, the
better the taste so try and be patient with it. Keep checking them and give
them a little stir and when you are satisfied then add in the crushed garlic
and give a stir to cook it out for a few minutes. Make sure not to burn the
garlic as it can make the whole meal very bitter.
Add the
chopped chillies, Rogan josh paste, tomatoes, tomato puree/paste, coriander
stalks, stock pots and water to the pot; give this a good stir so that
everything is combined. Leave to simmer on a medium heat for 30 minutes. Give
the curry a taste to see if it needs seasoning, add more if it needs it. I find
the stock cubes and curry paste to be quite salty but it’s up to your palate.
Add potatoes
and cook for 15 minutes. Add chickpeas and cook for a further 20 minutes.
Pierce the potatoes with a knife to check they are cooked all the way through,
when you are satisfied, add the spinach and coriander and leave for a few
minutes to wilt into the curry.
Serve with
natural yoghurt, extra coriander, a squeeze of fresh lemon juice, finely
sliced spring onions and chillies on top to garnish. Boil up some basmati rice,
heat up some chapattis and chow down.
Give it a go
and let me know how you get on. I personally love this as you can add all
different ingredients, if I feel like something different then I will do a
Butternut Squash, Cauliflower and Spinach curry with a madras curry paste or a
Chicken Kashmiri Masala Curry, just substitute the vegetables for chicken and
off you go.
I hope
you enjoy this recipe guys, let me know if you try it.
Monday, 6 April 2015
DIY Beauty | Green Tea Sugar Scrub
 |
Hi guys,
I have seen a
lot of blog posts and Instagram posts about coffee and tea based scrubs
recently and decided to put together a post with my favourite tea scrub of all
time, my own! I have used this scrub numerous times over the years and love how
it makes my face, lips and body look and feel. Tea scrubs can be amazing for
the skin, especially green tea as it has all kinds of health benefits such as
fighting inflammation, reducing stress, protecting the skin and best of all
preventing wrinkles. Most supermarkets stock these teabags but they offer
different variations, please stick to pure green tea though as they aren’t
blended with anything else.
As well as
green tea I used *Viridian
Nutrition`s 100% Organic Ultimate Beauty Oil (from £9.85 for 200ml)
which contains a broad range of potent antioxidants including Vitamin E, Alpha-Carotene
and Beta Carotene. This oil is vegan, kosher and organic and supposed to be
used in salad dressings and smoothies but I honestly can`t stand the taste of
it so I put it to better use and added it to my facemasks and sugar scrubs.
Onto the
ingredients now, but first...Always do a patch test 24 hours
before use, to make sure you are not allergic to any of the ingredients. I
normally do this on my inner forearm as its most like the skin on your
face. *If you are pregnant or breastfeeding please ask your doctor for
advice before using any oils as they may not be suitable for you.
Ingredients:
1/2 cup Sugar
(add more or less depending on preference)
1 Tbsp. of
Viridian Nutrition 100% Organic Ultimate Beauty Oil (substitute for Light Olive Oil)
1 Tbsp. of
honey such as Manuka or Lavender. If you can’t get one of these then normal
runny honey is fine.
1 x Mint Tea
bag
2 x Green Tea
bag
2 x drops Vitamin
E Oil (£1.59) (Skip this step if
you are using beauty oil which contains Vitamin E)
3 x drops of
any of the following oils to help with particular skin concern
Great for all
skin types and smells amazing! This is great for mature skin and minimising
scars.
An
anti-bacterial oil which is great at reducing pores and will help with acne
prone skin.
Will help to
improve skin tone, firmness, and skin elasticity. Can also help sun damaged
skin.
Great for
sensitive and mature skin.
Great for acne
prone and oily skin.
Method
Get a small
clean container and add the contents from the tea bags and the sugar, give it a
good mix to make sure it’s combined. Add the beauty oil, honey and all
essential oils and mix thoroughly until it’s a scrub like texture. If you
require the scrub to be coarser, don't add as much oil. Equally if you like it
a little more loose then add in some more oil until you have the desired
consistency.
Use
Double cleanse
your face if you are using it this to treat your face, this will ensure it is
clean enough before layering a generous amount of the scrub (it may fall off but just keep adding it
until it sticks). I normally leave on my skin for about five minutes to infuse
it with goodness from the oil and tea. If you are treating your body with this
scrub then grab a nice hot shower and work over the desired areas before
removing. It may leave your skin a little slippery so wash your skin again
with your favourite shower gel.
Have a go; let
me know what you think. If you really want to go all out and give your skin a
good old clear out, I would suggest a green tea steam before the
exfoliation step. All you need is a bowl of hot water with 2 x green teabags (leave to stew for about five minutes)
and a towel to cover your head whilst you relax. This will help to open up the
pores and infuse your skin with so much love and attention that you will be
reaching to do it every week (or maybe
more). As this is made with all organic and natural ingredients, you can be
sure that your skin and conscience will thank you!
Subscribe to:
Posts (Atom)
©
An Impatient Scottish Girl. All rights reserved.


